Now I have the cab mounted on a mobile cradle, it's time to start stripping it down to the bare bones so all panels can be accessed for repair & paint.

The floor panels on both sides are bolted to the frame.

Pulling them up exposes the frame rails and a LOT of Aussie-type red dust, spider webs, dead insects, etc. The cab has been fumigated, but if anything moves in that dust, I'm gapping it!

Removing the foremost floor panel gives excellent access to the rear of the light pods. I was pleasantly surprised at how easily most of the bolts came out. I broke one out of about 40 bolts - good score.


They detach easily by simply levering them up and out of the bushes.
Then the mounting brackets can be unbolted from the floor and rear bulkhead.

With all the floor panels out on the passenger side, the frame rails are exposed. They look a lot worse than they actually are - most of what you see here is loose debris and scale. They will clean up great - and it is a real bonus being able to get to areas like these by simply unbolting panels.

There is a vent panel on the passenger side.

Removing it exposes a bunch of ventilation hoses (and more webs)

 On the drivers side, the corresponding panel hides most of the electrics. I'm hoping I can get the entire wiring loom out in one piece to use as a pattern for a replacement loom.
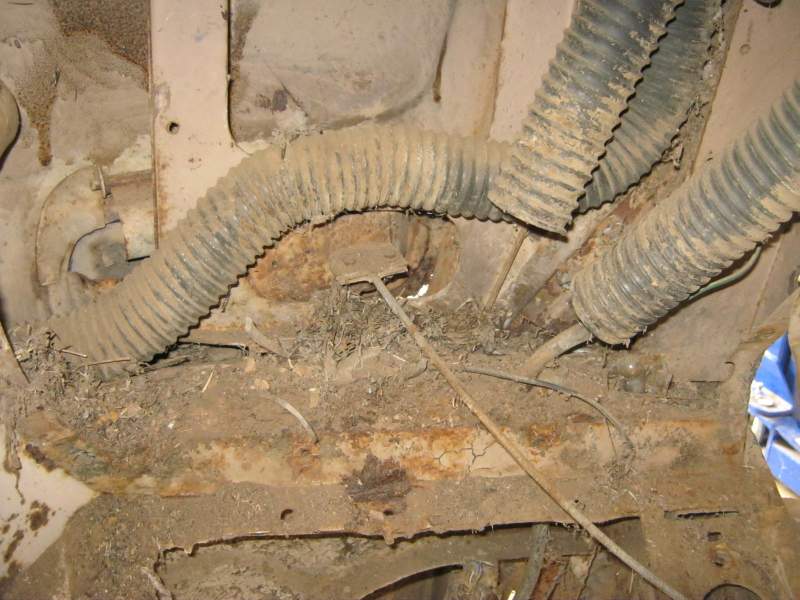
With the full-width dash panel removed, there is good access to the front panels. A lot more dust & debris in here .....

As well as a bunch of parts that had fallen down inside the cavity


Door catches came off relatively easily.
But the hinges will require more persuasion. The screw heads are pretty munted and the screws themselves seized in place. I'm thinking heat and penetrating oil.


The hinges are behind screwed plates on the pillar. Application of heat got some of them moved, but others needed to have the screw-heads drilled off and then cut through the shank to enable the hinges to be extracted from the narrow slots they fit in.


Rubber pads on the sill-steps hid some fairly nasty loose scale and perforated steel.
These are all the interior panels and fixtures. Pulling this lot out was a long job as I had to work very carefully to avoid damaging any of the parts - and especially the fasteners.

Some of these would not have been moved for over 50 years. The effort is well worthwhile, though - access to the bones of the cab and to the rear of damaged panels will make the resto job much easier.

Looking pretty bare-bones on the inside now - you can see that access is greatly improved and the lucky person who does the panelbeating will have a much easier time of it.


As for the outer panels - the left & right lower fronts came away fairly easily. This is great, because they are both bent-up a little. Headlight pods can also be detached.


None of the rust is particularly serious from a structural point of view. Dinged panels can be straightened - apart from that there are just a bunch of extra holes for accessories and modifications that have been added over the years. All quite straightforward.
So - now its back on the hoist and lift the whole plot onto my trailer. Looking forward to regaining some workshop space ;)


And its off to the storage shed until panelbeating can be done.
Now on to stripping the doors and packing up all the components, fasteners, etc for storage. Click here for the door page.
No comments:
Post a Comment